|
|
The magnetic applicator – one principle and many advantages.
It's in the nature of things: an improvement of a tried-and-tested technique
brings with it a change of working method. These instructions are intended to
give the user a pictorial demonstration of the optimized sequence of
application for this new design of B/S-brace Classic with magnetic point and
the innovative magnetic applicator. Most importantly, the application sequence of
the B/S-brace with these new technical qualities is even easier, even quicker,
even safer and even more perfect. To put it plainly: from now on everything is
simply effortless! The reasons for this are not only the technical changes to
the B/S-brace Classic itself but also to the multi-applicator. Specifically:
from now on the B/S-brace Classic has a magnetic point at the centre of the
brace. At the same time, each applicator is equipped with a magnet. This makes it
even easier and less complicated to use - from now on the B/S-brace can be
picked up with the magnetic applicator and
fixed in place with it; there is no need to hold the brace any other way. This
makes it possible to place the B/S-brace on the nail starting from the centre
of the nail - as with the previous applicator made of steel - or, as with the
previous multi-applicator, to work from one edge of the nail to the other. This
can be done in one movement, without turning the applicator around.
|
|
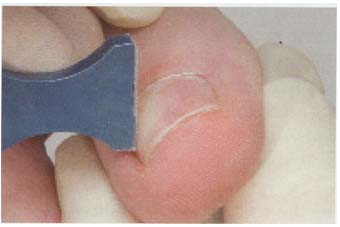
7. Application of the B/S-brace on the left edge of
the nail, press in place for about ten seconds
|
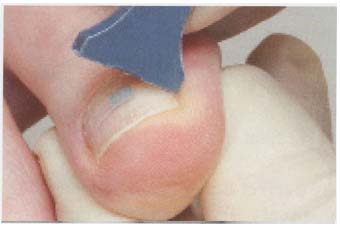
8. To the opposite side of the nail,
on the right, and press in place for another ten seconds
|
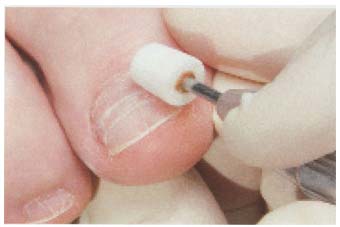
9. Levelling out the joins
|
|
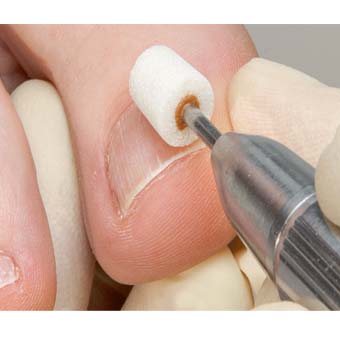
Careful preparation of the nail which is to be treated
Expert nail care is the
basis for achieving the best result, so nails which are exceptionally thick
should be ground thinner. Further, foot baths as well as use of disinfectant
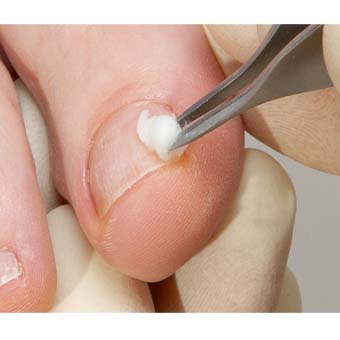
just before application of the brace should be avoided. The first step is to
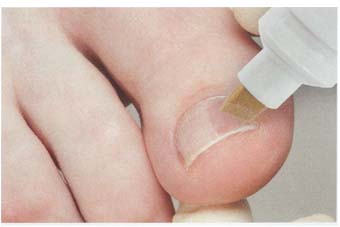
de-grease the nail with B/S cleaner (pic.2). Choosing the right size of B/S-brace
Classic and sticking it across the whole nail 1 -2 mm behind the part which is
causing pain is the best way to achieve the best effect. The brace should not
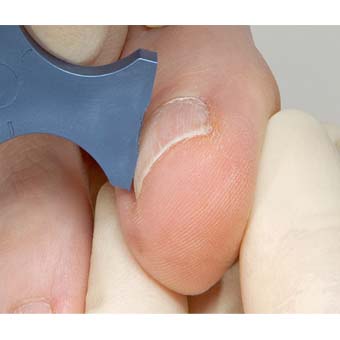
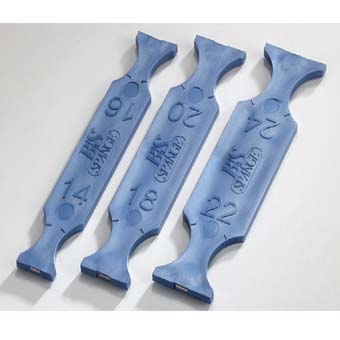
come into contact with the skin. In order to do this properly, place one tip of
the magnetic applicator at the exact edge of the nail where the B/S-brace is to
be fixed. Without slipping, roll the magnetic applicator across the width of
the nail to the opposite nail bed. The width of the nail indicates the correct
size of brace (pics.3).
Preparation of the B/S-brace
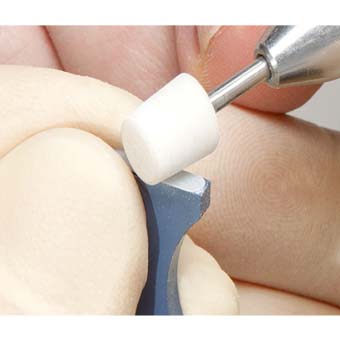
The correct size of
B/S-brace should be ground thinner at the ends, on the side of the brace
without the magnetic point. This can be done with the brace placed on one
finger or on the magnetic applicator. Then place the B/S-brace on the magnetic
applicator so that the magnetic point faces the applicator.
With the B/S-brace
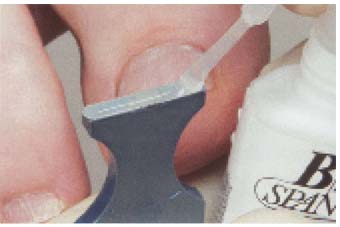
bonded this way to the magnetic applicator,(pics.6 ) and applying activator
(pics.5). Meaning: B/S-Basic adhesive can be applied to the whole of the
B/S-brace and then of course the activator is applied to the nail. Or, the
opposite way round, activator is applied to the B/S-brace and B/S-Basic
adhesive to the nail. Whichever way is chosen, activator should always be
applied before the adhesive. Be sure to apply a thick layer of adhesive. After
this (and, take a little break; the B/S-Basic adhesive cure time is two
minutes) the B/S-brace which is adhered to the magnetic applicator must be
applied to the nail immediately as usual. This means - from one side edge of the
nail to the other( pics.7 - 8) or, as an alternative, from the centre of the
nail to the right edge and then to the left one . As can be seen in the pictures,
no complicated intervention with the fingers is necessary either. If the
version is chosen where activator is applied to the nail then the whole nail,
including the B/S-brace, must be cleaned, using a swab moistened with B/S
cleaner. Wipe this across the nail - this removes the magnetic point from the
brace as well as the activator from the nail plate. Then level off the joins
between the B/S-brace and the nail; when grinding a B/S-brace use only a
diamond or corundum grinder. Altogether, these amount to important steps toward
more simple and safe application.
Individual correction of the tension
As long as the patient
does not feel any pulling pain then the tension is perfect. Ask the patient
specifically about this as it is easy to regulate. If the patient feels an
uncomfortable pulling pain or if the natural reset forces of the B/S-brace are too
strong, grind the brace thinner at the ends (pic.9).Alternatively, the whole of
the B/S-brace can be ground thinner. Finally, with this method of application is
it necessary to seal the whole of the nail and the
B/S-brace with B/S-Basic adhesive.
Final sealant for a perfect finish
Seal the whole of the
brace and the nail with B/S-Basic adhesive to make it secure and water
resistant. This is similar to applying nail polish. Clean the nail as well as
the applied B/S brace beforehand, using B/S cleaner. However, should B/S-Basic
adhesive be applied to the nail instead of activator then it is no longer
necessary to apply a final sealant. In this case, however, before leveling out
the joins of the brace edges or making any necessary corrections to the tension,
it is essential to wait for the B/S-Basic adhesive to dry. This takes about
four minutes. Once the B/S-Basic adhesive is dry wipe off the magnetic point using
a swab moistened with B/S cleaner. It is still possible to apply a final
sealant if desired.
The perfect finish is much easier
The usual nail care
using a plug, disinfectant or salve dressing is quite possible. The nail can
also be lacquered.
Strong material and a logical operating principle
The B/S-brace Classic is
made of special synthetic glass fibre and is ground exactly with an accuracy of
2/1000 mm. This material complies with the high, specifically defined criteria for
firmness and elasticity as well as for individual fitting by the user. Computerized
testing of the bending strength as well as the adhesive power is therefore
standard. The brace, which is made in six sizes, works the same way as a leaf
spring. This means that by applying the flat brace to the curved ingrown
toenail, the brace's own resetting forces are transferred to the nail. The
logical result: the nail is gently but carefully lifted out of the nail fold.
The physical laws of pressure and counter pressure automatically work
correctly, especially as the traction of the brace can be reduced slightly as
needed. This is done by grinding the brace thinner according to the principle:
the smaller the material thickness. the lower the traction!
|


